Planting a Bulb Lasagne
Firstly a bulb lasagne, a term first coined by the Dutch is not a culinary delight, it's merely the perfect analogy to describe how you can create a visual feast from late winter to spring with a single pot or container.
The secret is to select bulbs with different flowering periods in late winter/spring and then layer them within a large planter as shown below.
The best time to plant tulips is between mid and late autumn - planting too early can increase the risk of your tulips suffering from Tulip Fire*
However now is a good time to start planning your displays and buying bulbs and corms before they all disappear off the shelves. Spring flowering bulbs now on offer
Follow our 'HOW-TO' guide to planting your own bulb lasagne this autumn and then sit back and wait for the show to start in spring.
- First pick a selection of bulbs that will flower in succession over a long period and combine well in terms of colour.
Here we have chosen CROCUS species mixed which flowers February to March, NARCISSUS 'Tete-a-Tete' which blooms March to April and TULIPA 'Triumph White' which flowers from late April into May.
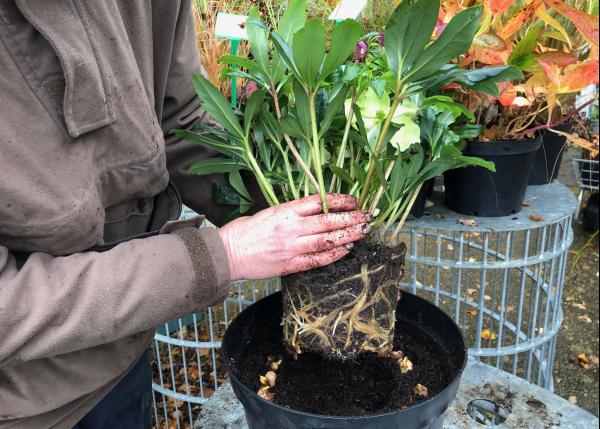
To top it all off we will add a small HELLEBORUS which will bloom from mid December onwards, extending the period of enjoyment even more.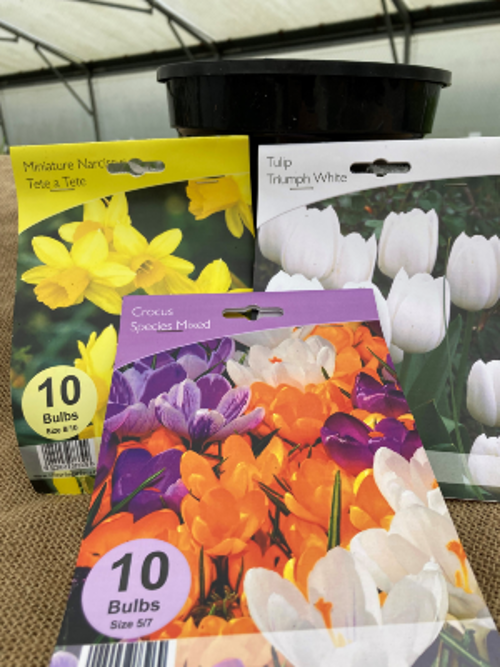
Plant these in a large recyclable plastic pot placed inside a larger container of your choice for flexibility. Once the spring display is over, the inner pot can be replaced with one planted up for summer and even later, one for autumn.
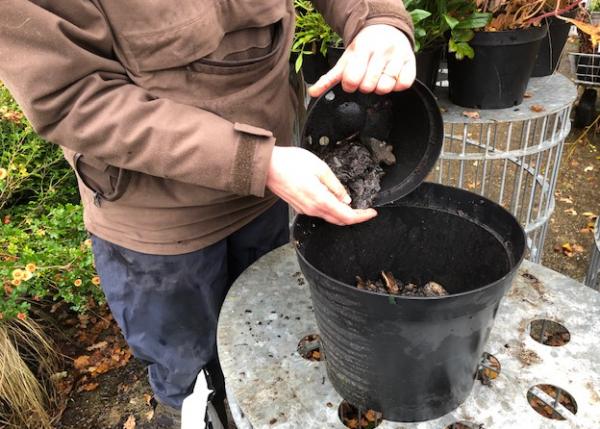
- Although both the white pot and black plastic pot have drainage holes, it is still a good idea to make a reservoir at the bottom of the black pot where excess water can collect within the pot before draining out.
To create the reservoir put a 3cm layer of small stones in the bottom of the pot and shake them level.
Then cover the stones with a 3cm layer of compost and gently shake the pot to remove any air pockets.
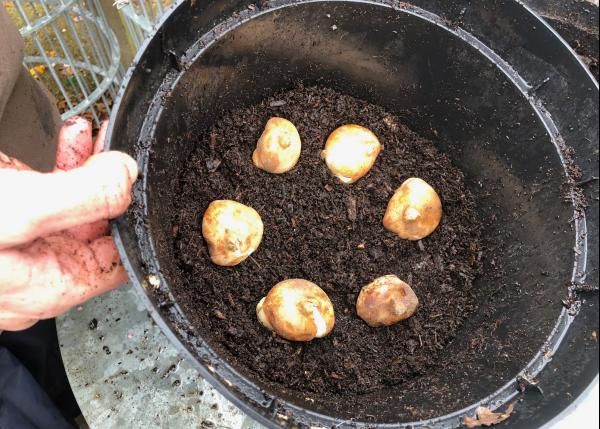
- Now to start planting the bulbs. A simple rule to follow is '
When planting bulbs of a similar size then the last to flower is planted lowest in the pot'. Plant most bulbs at two to three times their depth.
The first bulb layer to be planted is the TULIPA.
Carefully place the tulip bulbs 'pointy end up - hairy end down' in a circle and then cover them with 3cm of compost, level it off and gently shake the pot.
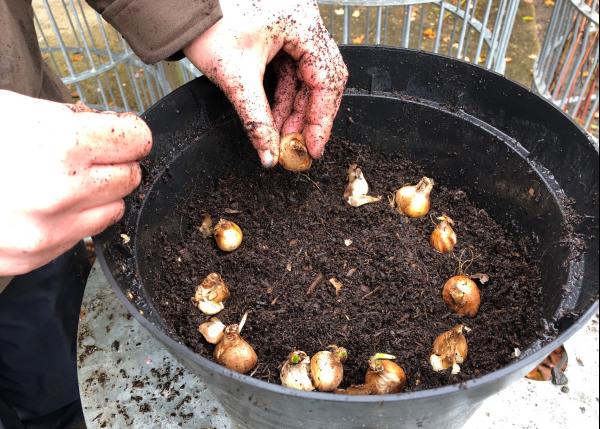
The second layer to be planted is the NARCISSUS - again in a circle, pointy end upwards.
Don't worry too much if the layers overlap occasionally, the shoots will bend around any bulbs above as they grow to reach the sunlight.
The NARCISSUS are then covered with a 3cm layer of compost and levelled off.
The third and last layer of bulbs to be planted are the CROCUS - first to flower and in this case the smallest bulb.
Once again plant these 'pointy end up, hairy end down' in a wider circle making room for the roots of the small HELLOBORUS which are added at this stage.
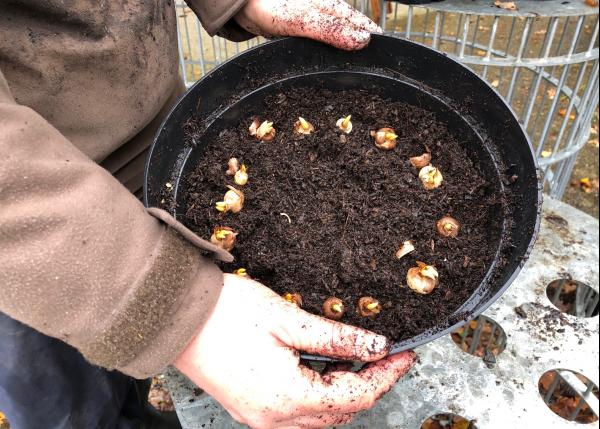
Then add compost carefully around the sides of the HELLOBORE and on top of the CROCUS bulbs, gently shaking the pot to settle the compost until its surface is approximately 1.5cm below the lip of the plastic pot, allowing the pot to be watered without washing away the compost.
- ALL FINISHED - now you just wait 'til Spring
If the weather is dry, give the pot a water then leave it outside to catch natural rainfall from autumn to spring.
*Tulip Fire"is a fungal disease of tulips caused by Botrytis tulipae, which produces brown spots and twisted, withered and distorted leaves. It is so named because plants appear scorched by fire" RHS 2021